Every sewing enthusiast needs notions to make those dream projects a reality. From the basics like a sewing machine or scissors to refined options like a seam ripper necklace, it’s fun to find unusual and useful sewing tools. Here are some interesting notions we weren’t able to fit into our digital issue. Keep checking back for updates as we discover new items.
Smart and Simple Sewing Machine

If you’re just starting out in your sewing career or are a seasoned professional, Brother’s CS 5055PRW sewing machine is a solid choice that is as affordable as it is versatile. As part of their Project Runway line of machines, this limited edition machine offers 50 built-in sewing stitches, including five styles of one-step auto-size buttonholes. Choose from a range of decorative, quilting, or heirloom stitches for your ideal wardrobe embellishments by using its bright LCD display screen. A smooth feeding system makes sewing on thick fabrics successful, and a free arm enables you to sew cuffs and sleeves with ease. Additional features include an advanced needle-threading system. (Visit Brother-USA.com to find a dealer near you; $149.99)
Fundamental Scissors
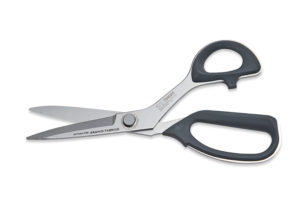
Beginners need the good tools, because if they don’t use the best and get lousy results, they tend to blame themselves. Three essential good-quality scissors are Gingher’s 4-inch embroidery scissors and 5-inch all-purpose tailor’s points, and Kai’s 9 1/2-inch micro-serrated shears (model 7240-AS). The embroidery scissors have large thumb holes and are sharp and lightweight. The tailor’s points are slightly larger and cut through anything. The Kai shears make cutting through fabric as easy as cutting warm butter, and they’re easy on the hand. (Available at SusanKhalje.com; $30.00 – $90.00)
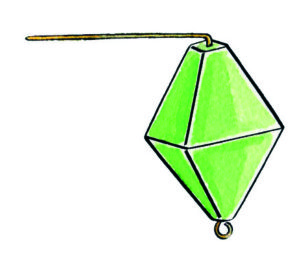
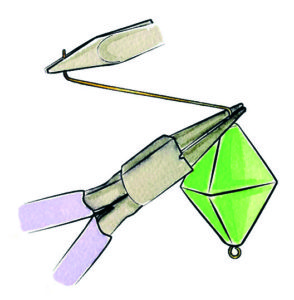
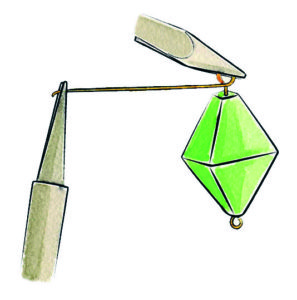
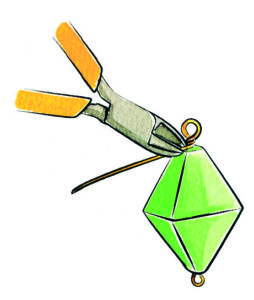
Stunning Sewing Jewelry
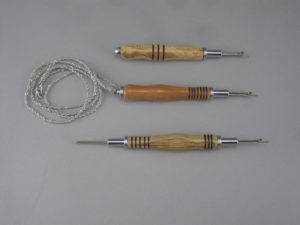
Hanging a seam ripper on a chain keeps it within easy reach. Sawyer Creek Artistry’s beautiful seam rippers and stilettos feature hand-turned wood handles made of Middle Eastern olivewood or native Ozarks species. Each handle has a different ergonomic shape and features a concealed, removable seam ripper or stiletto head; remove the head and reverse its position when needed. A magnet embedded in the tool’s opposite end secures the tool to the chain and releases easily for use. The tools are available in different configurations: single, combo, necklace, and stylus. (Visit SawyerCreekArtistry.com to order; $15.00 – $20.00)
Helpful Seam Ripper
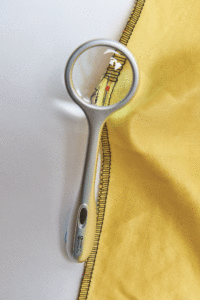
It’s often difficult to remove stitches from fabric, especially when the fabric and thread colors are similar. That’s why many sewers would benefit from Might Bright’s Lighted Seam Ripper and Magnifier. This tool features an energy-efficient LED light, a rotating seam ripper arm, and a 4X magnifier for a stress-free seam ripping experience. (Available at MightyBright.com; $9.99)
A Clear Way to Measure
Clear gridded rulers in different lengths and with different scale grids are a must in the sewing room. (If you follow our sew-along of Simplicity SewStylish 8328, you’ll see that we use a clear 18-inch by 2-inch ruler in the sewing room all the time.) Westcott’s LetterCraft beveled 18-inch by 2-inch by 1/8-inch gridded ruler is inexpensive and a handy tool for marking seam and hem allowances. Its transparency makes it easy to see pattern adjustments as you make them. Once you try one, you’ll realize you could use more around the house, handy whenever you need to measure. (Find yours at Amazon.com; $6.75)