In many garment sewing projects, darts are going to be the first stitching you’ll do in the construction process.
Darts are wedge-shaped tucks that create shape within a garment. They are effective anywhere you want to fit body curves, such as at the bust, waist, and hips. Darts are not difficult, but there are a few tips to follow to achieve better results.
Dart Anatomy
First, let’s look at the parts of a dart, and I’ll share some terminology, so you‘ll know what I am referring to.
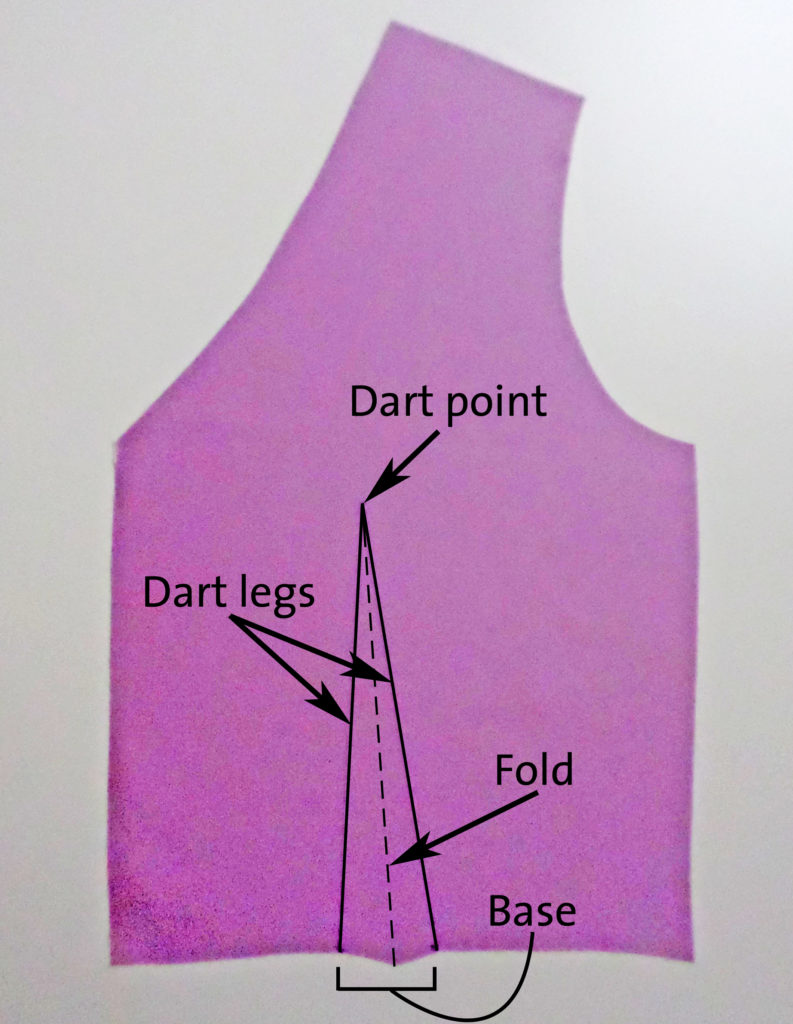
At the base, a dart is wide and takes up more fabric. That is where it fits a narrower part of the body, such as the waist. As a dart narrows to the tip, fabric is released to contour over fuller areas of the body, in this case, the bust.
The Simplicity SewStylish 8328 View C top has bust and waist darts to create a flattering, body-skimming fit. You’re going to sew the darts in the underlay fabric as well as the lining, so that the layers mirror each other and have the same fit.
There are also bust darts in the View C top lace overlay, but we’re going to save those for next week. I’ll tell you why at the end of this post.
I have some great tips for sewing and pressing darts from past Threads magazine articles. I’ll show you the process on one bust dart in the top underlay fabric. The steps and advice will work for all the darts in the top’s underlay and lining.
Dimples are cute on babies, not on darts
Your goal is to sew darts that come to a smooth, tapered point. On the right side of the fabric, the dart point doesn’t end in a bump, dimple, or bubble. Proper stitching, plus pressing, will accomplish this.
- Make sure the dart legs are accurately marked on the fabric’s wrong side. I suggest, if you are new to sewing, that you trace the dart legs completely with an air- or water-soluble pen. it’s nice to have the marked leg to stitch along for accuracy. When you get confident, you can just mark points along the dart legs with pins.
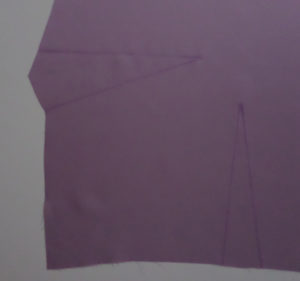
Mark the dart legs on the fabric’s wrong side. We’re going to sew the bust dart – the horizontal one on the left. - Fold the dart, right sides together, aligning the dart legs. Poke a pin straight through and check both sides to make sure the legs are right on top of each other.
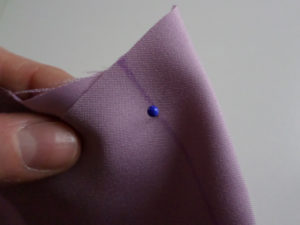
Align the dart legs, then poke a pin through to check the alignment. Please excuse my lack of a stunning manicure. 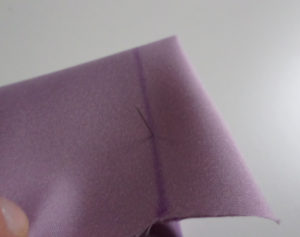
That looks good. The pin poked straight through the other dart leg. - The fold will pass right through the dart point. Place a few pins through both layers, perpendicular to the fold to secure it.
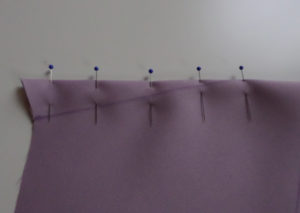
Perhaps I used more than a few pins. You get the idea. - Move to the sewing machine. Select a straight stitch, 2.5 mm to 3 mm long. Position the needle right over the dart leg marking at the fabric edge. There’s no need to use a backstitch or locking stitch, because this seam allowance will be crossed by another seam.
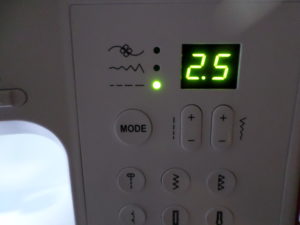
Use a standard stitch length and start at the dart base. 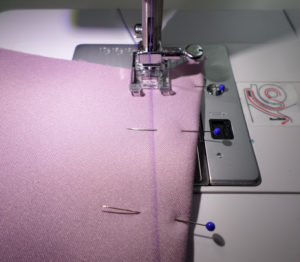
Lower the needle into the dart leg marking, and prepare to sew. Don’t forget to remove the pins from the stitching path as you proceed. - Stitch along the dart leg marking until you are about ½ inch from the dart point. Pause, with the needle in the fabric, and adjust the stitch length down to 1 mm.

Reduce the stitch length when you get close to the dart point. - Sew right off the fabric at the dart point. Lift the presser foot, and pull about 5 inches of thread out.
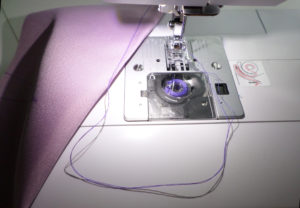
Stitch off the fabric at the dart point, then pull some thread from the sewing machine. - Tie the thread ends in a knot, then trim them about ½ inch from the knot.
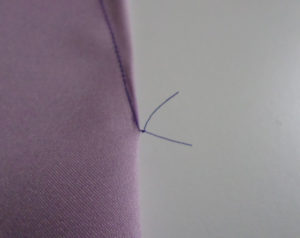
Knot the threads to secure the dart point. - Now, it’s time to press the dart for shape. First, press the dart as sewn, like this:
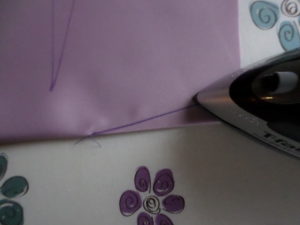
Press the dart as it was sewn, to set the stitches and crease the dart fold. - Next, press the dart over a ham to mold it. On the bust darts, fold the dart value down, toward the hem. Press the dart from the wrong side, then the right side, adjusting the dart position on the ham to form it smoothly.
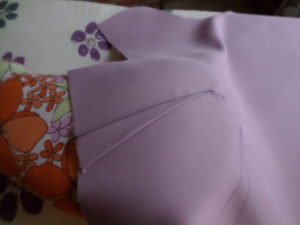
Press the dart on a ham. On a bust dart like this, press the dart value down, toward the hem. 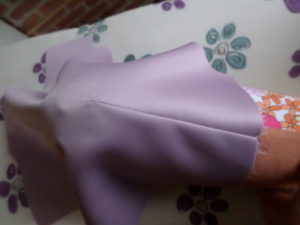
Position the ham to support the dart tip while you’re pressing it into shape. - Repeat this process with each dart necessary to shape the View C top’s fabric sections.
I have a parting tip for you.
- I fold and pin each dart separately. I don’t think it saves any time to try and pin them all at once, then sew them. I’ve found as I sew dart one, a pin goes missing from dart 3. I think it’s fine to sew them one by one, carefully and accurately, then press them all.
Next week, we will sew darts in the lace overlay for the Simplicity SewStylish 8328 View C top. I’ll show you a way to lap and appliqué the lace darts, so that they just about disappear. No-one wants an obvious dart marring the pretty lace pattern on her top, am I right?
Save
Helped me so much. I’ve always had problems with darts.
Whenever I press a dart on the wrong side of the fabric I take an envelope and position it under the darts folded edge. By doing this you do not have an indentation of the dart on the right side of your garment. It is a good idea to do the same thing when pressing on the right side of your garment.
Hi Maria, You are 100% correct about using an envelope – or personally, I use a manila folder – to buffer the dart value while pressing. I actually had some pictures of that for this post. I didn’t go into it, however, because this dart will be covered by a lace overlay. Any press-through from the dart will be hidden by the lace. You make an excellent point, though, and the next time I write about a dart that will show, I’ll be sure to include this pressing tip! – Sarah Mc
I love this tutorial. It makes sewing a dart so easy and beautiful. Thanks
Love this. Don’t like darts. I like the pictures. Easier for me than video. Thanks.
Hi Pat, glad you enjoy the post format. IME, it can be easier to follow step-by-step in a blog than a video. However, it can be difficult to judge fit or see how fabric drapes in a blog post. We’ll have another video at the end of the sew-along so you can see the ensemble on Penelope, our model. – Sarah Mc
Thank You!
Excellent! Thanks!
any tips for sewing darts in stretchy fabrics? I’ve had mixed success. Should I use a stabilizer?
Thank you for the info on ending at the dart point. Have sewn for years, but that technique eluded me. My dart sometimes had a pucker at the point.
Thanks. This was very interesting. Sometimes I forget or hurry and it’s the little things can say HOMEMADE. I enjoy this series.
Hi, if you have a garment with a lining with darts located in the same location, do you recommend sewing the darts for each layer separately and then put together the fashion fabric and lining layers? Or, do you join the layers, and then sew the darts as one construction to ensure alignment of the darts?
I appreciate your very helpful tutorial and hope my question is understandable.
Joining fabric together and sewing as one is called underlining. Depending on the fabric and style underlining may be necessary. Lining however is not sewn together as one in most cases. I would sew the darts separately making sure the lining bust dart is not longer the the fashion fabric. Depending on the weight of the fabric you can chose to trim the inside of the dart and press open to eliminate bulk. You should not trim the lining. The lining dart is press in a downward direction.
Since you may have darts in other areas, trimming bulk may not be necessary, then the darts are still sewn separately and pressed in the direction shown on the guide sheet.
Thanks Rosanne, for the thoughtful answer to John’s question. I appreciate the assist! – Sarah Mc
Hi John, Good question, and totally understandable. I think Rosanne did a great job of answering your question, however! In this case, I am not underlining the top fabric. It is a quite stable poly satin. I am sewing the fabric and the lining darts separately. As Rosanne mentions, I might trim the dart value in the fabric only, but I am going to assemble the fabric and the lining bodice layers first and see just how bulky the layered dart values are. I will include a picture of each separate bodice layer – lining, fabric, and lace – with darts in the next post. – Sarah Mc
Thank you, very clearly visible for understanding how to properly finish darts, now to get the rest completed!! Your ‘manicure’ blended beautifully with the lovely lavender fabric and colorful pins!
Ha ha, thanks Gloria! I am fully aware of the beautiful nails many bloggers have, but nail polish does not last an afternoon on me, though, so there’s no point. I did invest in special pins, glad you noticed 🙂 – Sarah Mc
Thanks Rosanne and Sarah for the answer on dart construction (I am sewing a grandaughter’s American Girl Elsa gown but thought the question appropriate for similar construction in a “real” size for my wife!).
BTW, I find “over the top” nail jobs very distracting for tutorials! Yours are most appropriate in my opinion.
Thanks again.